Tuesday, June 28, 2011

Chop Chop

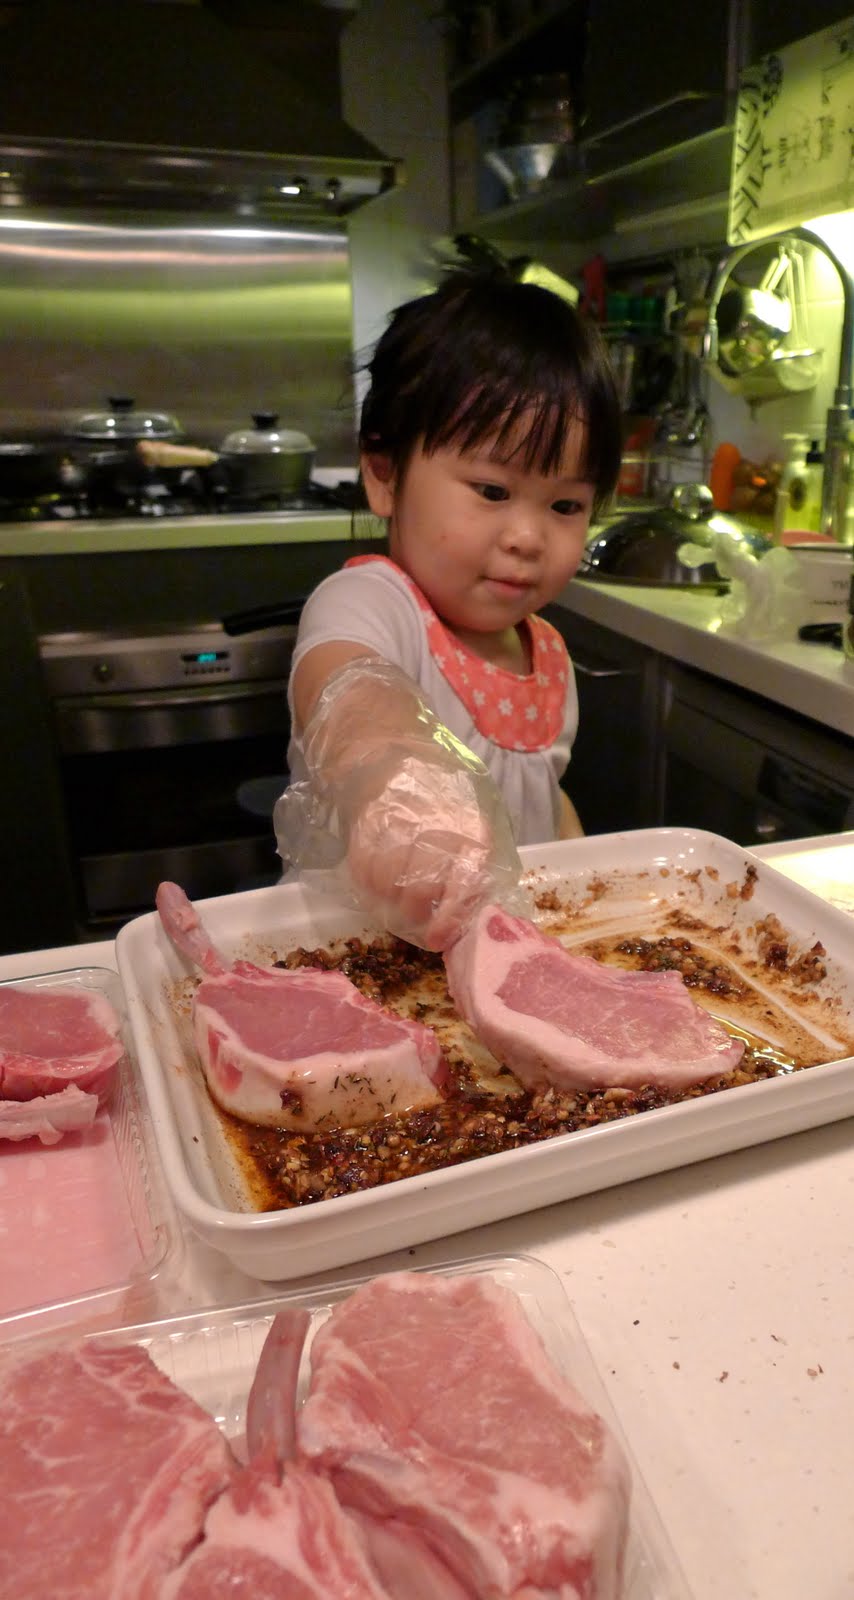
Spiced Pork Chop


This is a Gordon Ramsey recipe n you could not imagine how these spices lift up the full flavor of the pork chops while not overpowering the sweetness of the meat. I think it works best with quality Iberico chops with bone as it could be served "à point". Balance off the spices with crushed sweet potatoes.


serves 4
4 pork loin chops with bone, about 300g each
(US or Iberico recommended)


Spices
½-1 tsp mild chilli powder
1 tsp sweet paprika
3 tbsp olive oil
A few thyme sprigs
4 garlic cloves, finely chopped
5-6 star anise, lightly smashed
1 tsp coriander seeds, lightly crushed    


  • Pre-heat the oven to 180˚C.
  • Mix the chilli powder, paprika, pinch salt and pepper with the olive oil. Add the thyme, garlic, star anise and coriander seeds. 
  • Coat the chops with the spices and leave to marinate for at least 30 minutes or in the fridge overnight.
  • Sear the chops in a hot pan with a little olive oil until golden. Transfer to the oven and bake, uncovered, for about 15 minutes until the meat is just firm when lightly pressed. 
  • When cooked, leave the chops to rest in a warm place for 10 minutes.


Crushed Sweet Potatoes
3 large sweet potatoes, about 350g ( butternut squash recommended) Chicken stock, enough to cover the potatoes
1 shallot, peeled and finely chopped
bunch of sage leaves and coriander, roughly chopped
  • Bring a pot of chicken stock to the boil. 
  • Peel and cut the sweet potatoes into 1½ cm slices. Add to the chicken stock and cook for 7-8 minutes until almost tender when pierced with a skewer (they should be just slightly undercooked at this stage). Drain and refresh under running cold water. Dice the par-cooked potatoes and set aside.
  • Sauté briefly the shallots and chopped garlic in a pan with hot oil until they start to caramelize, then tip in the sweet potatoes and toss to mix. Season lightly and cook and stir occasionally for 5-6 minutes. 
  • Lightly crush the potatoes and finish with the chopped sage and coriander.
To serve, spoon the mash onto plates and place a pork chop on top. Drizzle juice of the pork chops on top and CHOP!

Tips: It is important to rest the meat for a few minutes before cutting it to have the full juicy tenderness of the meat.


Sunday, June 26, 2011

Simply Divine for a Dinner Party!

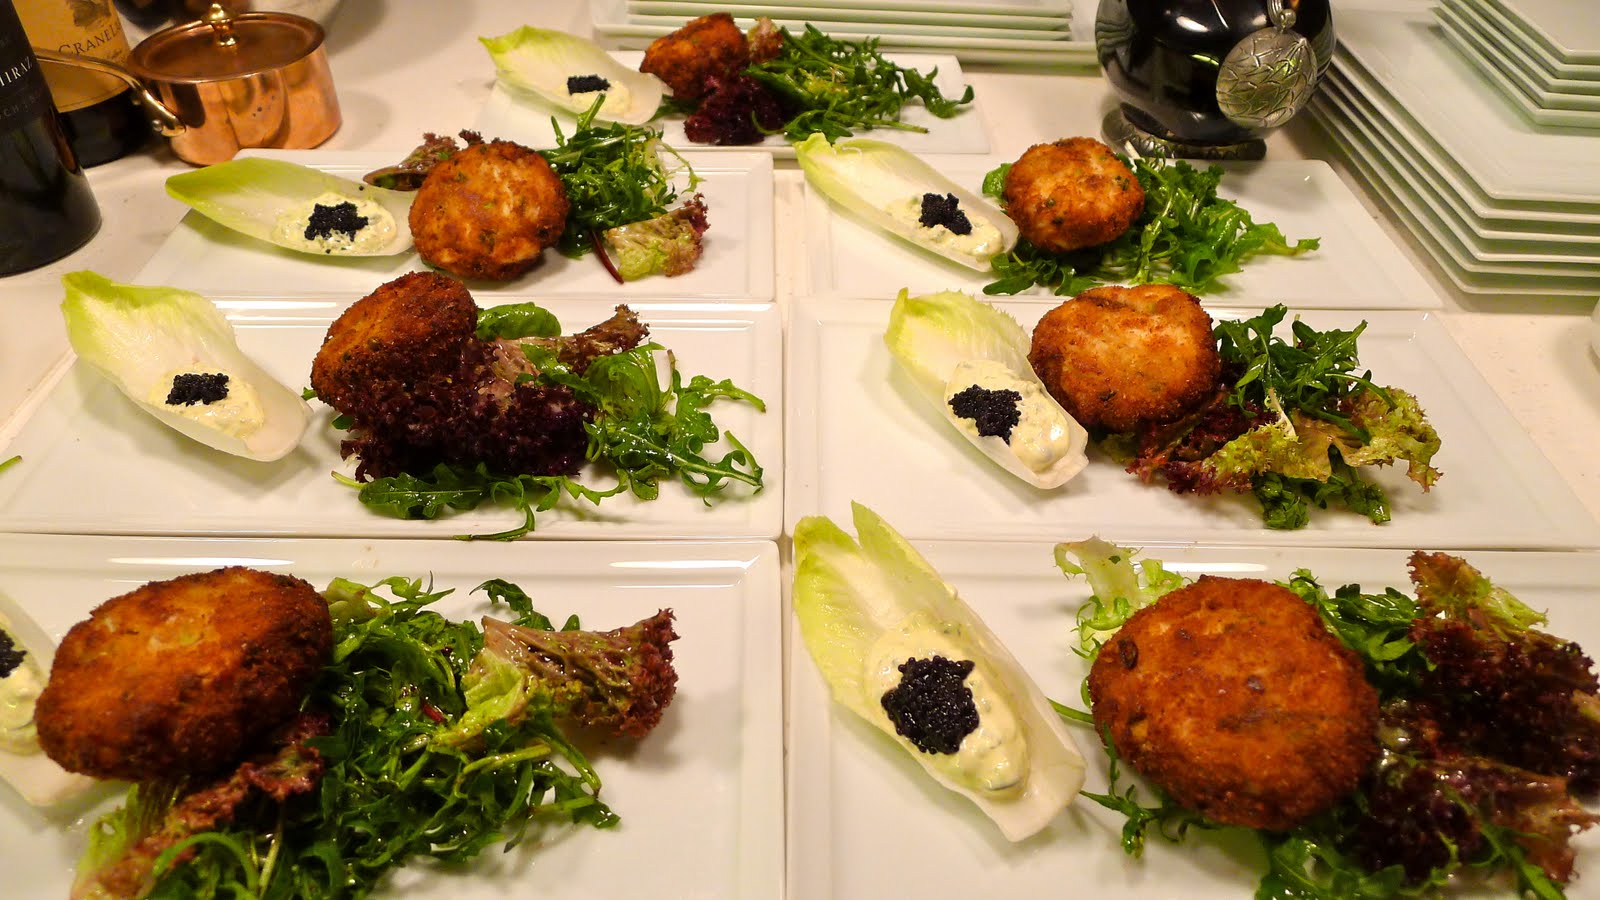
Delmarva Crab Cakes
Homemade spiced, crisped while plumped Dungeness crab cakes! Totally Speechless!
serve 6 
Crab Cakes
2 large live Dungeness crabs (1 pound lump crabmeat)


½ cup bread crumbs
¼ cup mayonnaise
1 large egg, beaten
1 tbsp Dijon mustard
1 scallion, finely chopped
½ tsp Worcestershire sauce
½ tsp Delmarva seasoning
vegetable oil for deep-frying

Delmarva Seasoning 
(quantity of 3 tbsp)


2 tsp salt

1 tsp cayenne pepper
1 tsp celery seed
1 tsp dry mustard
1 tsp sweet paprika
1 tsp ground black pepper
1 tsp ground bay leaf
¼ tsp ground cloves
¼ tsp ground all spice
¼ tsp ground ginger
¼ tsp grated nutmeg
¼ tsp ground cardamom
¼ tsp ground cinnamon

Cucumber Tartar
 1 cup of cucumber cubes in small dice, peeled and seeded
pinch of sea salt
½ cup mayonnaise
1 scallion, finely chopped
2 tsp capers
1 tsp anchovy paste
  • Steam the crabs as a whole for 20mins. Leave the crab cooled down then refrigerate for at least 2 -3 hours so the meat will stay firm and plump. Detach all crabmeat from the body, legs and claws as much and in big pieces as possible. Set aside.
  • Mix bread crumbs, mayonnaise, egg, Dijon, scallion, Worcestershire sauce and Delmarva seasoning altogether in a bowl. Fold in the crabmeat and the roe (if preferred).
  • With wet hands, form the crabmeat mixture into 3 inches wide and ¾ inch high crab cakes. Coat each crab cakes with extra bread crumbs.
  • Deep-fry the crab cakes with ½ inche of vegetable oil by turning once until light golden colored. Place crab cakes onto paper towels to drain.


Serve hot with tartar and some greens with vinaigrette.

Wednesday, June 15, 2011

Bonjour!

Super Runny Omelette
What could we possibly ask for more by pampering yourself with a wonderful happy breakfast on the weekends. If you like your omelette a bit runny, we are on the same page!
4 eggs
few rashes of bacon / pork sausages
brown button mushrooms, sliced
2 medium sized tomatoes, skinned, deseeded and diced
bunch of basils, roughly chopped
parmesan, grated
10g demi sel butter
olive oil
salt n pepper to season
2 slice of thick toasts


  • Whisk eggs in a bowl. Season with pinch of salt.
  • Pan-fry the bacons / sausages till lightly browned and crispy, on the outside (sausage).
  • Skin, deseed and dice the tomatoes. In a separate pan over medium heat, tip in the diced tomatoes with splash of olive oil, pinch of salt and sugar. Cook for about 1 minute until the tomatoes are just soft then fold in the chopped basils. Set aside.
  • Thickly slice the mushrooms. Sauté with 5g of butter and olive oil over a non-stick pan. Season with salt n pepper. Stir occasionally or shake the pan to flip the mushrooms to cook on both sides. Once the surface look glossy and brown, remove from fire and set aside.
  • Meanwhile, grill the think toast with olive oil.
  • In a non-stick medium heat pan, put in 5g of butter and a splash of olive oil. Without browning the butter, pour in the eggs and immediately shake the pan and use a spatula to slightly break n stir the eggs. When the eggs are set at the bottom but still runny in the body, take the pan off the heat.  Fold in the mushrooms, tomatoes with basils and a handful of grated parmesan and leave them cooked in the omelette over the heat for another 10-15 seconds. Off the fire and pour the omelette onto the plate while folding the omelette in half.


Serve immediately with a few rashes of bacons and a nice thick slice of grilled toast. What a wonderful beginning of a break!

Sunday, May 29, 2011

What Life could be Expecting

Sweet N’ Sour Pork Ribs 
生炒排骨


Sweet and Sour - What life one could be expecting, but that is what made us an unforgettable one!
My mother-in-law taught me how to manage the crispy yet juicy deep-fried pork ribs. Her tips are soooo good that the dish became a zero failure. There is no need to crave for sweet n’ sour pork from restaurants anymore.


1lb pork ribs (一字排), cut in 1½ inch cubes n pat-dried
1 cup of corn starch
1 egg, beaten
½ pepper, yellow and orange, sliced in big diamond shape
½ pineapple, sliced in trunk
vegetable or canola oil for deep fry
pinch of sea salt and sugar to season

The Sauce
3tbsp white vinegar
3tbsp water
2tbsp ketchup
1/2 - 1 tbsp worcestershire sauce
sugar (at your taste)
1tsp corn starch
  • Marinate ribs with pinch of salt n sugar.
  • Whisk 1 egg. Soak ribs in the egg wash briefly. Immediately coat the ribs with a thin layer of corn starch. You can do that by shaking the powder onto the ribs within a plastic bag so the powder will stay thin and evenly.
  • Deep-fry the ribs in a good amount of canola oil until the oil is no longer bubbling.  Take the ribs out and set aside. At this point, the ribs should be cooked but not crispy enough. Leave the oil to cool down in the pot to prepare for the 2nd frying process to follow.
  • Meanwhile, stir fry the peppers. Add in pineapples. Remove from heat and set aside.
  • After the frying oil came to a cooled down, reheat the oil in high fire. Once the oil is bubbling hot again, deep-fry the ribs once again until the color gets more golden and became crispy. Drain out the ribs and set aside.
  • Prepare the mixed ketchup sauce in medium heat and simmer for a few minutes until the sauce thicken a bit.
  • Toss the ribs, peppers and pineapples into the ketchup sauce quickly until well blended. Serve immediately.


Tips from mother-in-law: 
The oil must come to a complete cooled down after the 1st round of deep-fry and reheat the oil for the 2nd round in order to attain full crunchiness even after blended in with the sauce.


    Saturday, May 28, 2011

    An Ideal Lunch

    Egg Sandwich, my way!
    I invented this sandwich with one idea in mind, “availability”. Who said we are bounded by recipe? Simply check what is available from in fridge and voila!

    few endive leaves
    2 hard boiled eggs, smashed
    caviar
    mayonnaise
    sprigs of dill (optional)
    olive oil
    sea salt n pepper to season
    white toasts
    • Break and blend the eggs with forks. Mix with mayonnaise and season. Add in dill if available.
    • Drizzle olive oil and season the endives.
    • Spread a generous layer of egg mayonnaise onto a piece of endive and toast. Add a good dash of caviar on top if you are a fan of it. Season with pepper n yum!Egg Sandwich, My Way!


    Tuesday, May 10, 2011

    The Lemony Snow White

    our little Snow White


     Lemon 
    Curd 
    Meringue 
    Tart


    Even you may not prefer the taste of tangy and tart, the acidic sharpness of the lemon balanced with the sweet fluffiness of the meringue actually turn out to be quite a blissful marriage!

    When I asked my husband to guess how I would name the tag line of this tart, he said “Volcano” while I named it a “ Lemony Snow White”. There is obviously not only the contrast of tartness and sweetness, but also man and woman!

    Preheat oven to 180C

    Pastry Dough
    125g butter, diced
    100g icing sugar
    1 egg yolk at room temperature
    vanilla seeds
    zest of ½ lemon
    a pinch of salt
    250g unbleached all-purpose flour
    2 tbsp water
    • Mix the butter, sugar, egg yolk vanilla seeds, zest and pinch of salt gradually with fingertips over a well of flour until it comes together into coarse breadcrumbs foam. Add the cold water. Pat the mixture together to form a dough. Minimize the movement of the dough o keep it flaky. Wrap it with a clingfilm and refrigerate it for an hour.
    • Roll the pastry out into an 11-inch circle or cut it into slices of your desired pastry thickness. Line the pastry over a loose-bottomed flan tin. Gently press the pastry up against the sides of the tin and trim the excess dough over the edge. Use a fork to prick the bottom of the pastry shell.
    • Place the pastry in the freezer for 1 hour to avoid it from shrinking.
    • Fill the pastry mould with dried beans over a greaseproof paper in between. Bake the pastry blind over 180C for 12 minutes until cooked.

    Lemon Curd
    1 cup of fresh lemon juice
    zest of 4 lemons, grated
    1 cup of caster sugar
    5 eggs and 4 yolks
    60g unsalted butter, softened
    • Fold in lemon juice, zest, sugar, eggs and yolks into a thick-bottomed pan and whisk over a very low heat or on a pan of simmering water. Whisk constantly for about 5 minutes or until the mixture start to thicken then stir in butter. Continue whisking until the mixture nicely coats the back of a wooden spoon like thick custard. Remove from the heat and set aside to cool down a bit.
    • Give the curd a final whisk when it is still lukewarm then pour it through a fine sieve into the pastry mould. Spread the curd out evenly with a spatula and shake gently so the mixture stays nice and flat.
    • Bake the tart for 10-12 minutes or until the filling is well set but not browned.
    • Leave it cool down on a wire rack on the side while proceed to prepare the meringue topping.
    Meringue Topping
    5 -7 egg whites
    150g caster sugar
    • Beat the egg whites to peaks with the sugar.
    • Pour the meringue over the tart and peak it with a fork. Caramelize it with a blowtorch or back into the oven for 5-7 minutes until it turned lightly golden.


     Here’s truly a paradise on earth for the summer!

    Tips from Jamie Oliver on the pastry: 
    Once the tart shell is baked blind, brush the inside with a little egg white and bake it again in the oven for another 30 secs. This will give the tart shell a nice waterproof layer and protect it from a moist filling.

    Monday, May 2, 2011

    Painting with Soya

    鼓油雞(家教雞)
    Soya Sauce Chicken

    My dad said his grandpa named this chicken as 家教雞, a chicken based on a cooking method transferred from generation to generation. At least now I have picked it up and obviously Cheriann has managed to follow the fundamental as well...


    My dad did acquire quite some good tips from the commercial side and was able to bring them into practice with his own recipe transferred from his great grandpa or grandpa.


    1 quality Kaimei chicken (the cockerel) 嘉美雞

    The Sauce
    ½ bottle Dark Soy
    3-4 piece medium sized rock sugar or ¾ piece of cane sugar (片糖)
    ½ bottle Quality Light Soy Sauce
    1 anise star
    1 cinnamon stick
    1 tbsp of juice of ginger
    2-3 tbsp of Shaoxing wine (紹興酒)
    1 tsp mei kuei lu chiew – Chinese rose wine (玫瑰露酒)


    • Air-dry the chicken by hanging it or on a chicken chair over night.
    • Dissolve rock sugar with the dark soy sauce at your desired taste. Paint the chicken with the dark soy sauce and leave it air-dried again. Continue this process 3 times. The chicken should have a nice glossy dark skin.
    • Fold in the rest of the sauce ingredients together with the dark soy painting sauce and bring to a boil. Check the taste and adjust with more soy sauce or sugar as desired. 
    • Pour the sauce preferably in a tall slim cooking pot that can fit in the chicken in an upright position. The chicken should be completely submerged in the sauce. Add extra water and further adjust the taste of the sauce if needed.
    • Cook the chicken based on the below timing:
      • Cook a small sized chicken in the boiling sauce for 3-4 minutes then off fire. Leave it covered and soaked in the sauce for another 35 minutes to continue the cooking process.
      • Cook a large sized chicken in the boiling sauce for 4-5 minutes then off fire. Leave it covered and soaked in the sauce for another 40-45 minutes.
    • Take out the chicken from the sauce and leave it cooled down before cutting it so the meat will stay intact and firm in texture.
    • To serve, reheat the sauce while cutting the chicken. Pour the sauce all over the chicken then drain the sauce out. Repeat this process for 3-4 times till the chicken became warm. Serve the chicken with some sauce or on the side. 


    Tips: 

    If you are a soy sauce chicken fan, it's worthwhile to invest into a chicken chair and a tall slim cooking pot.